

(You can set this up in 2 minutes)
This is where you tell Freshteam who you are.
Navigate to Settings > Company and give here your company name, industry, preferred language, and anything else you'd like to remember.

(Takes 5 minutes)
Working out of the office from multiple locations? You can cover them all with a single instance in Freshteam. Navigate to Settings > Locations and, start listing your locations, their respective time zones, languages, and everything else.

(Takes seconds to update a Department or Team )
This is where you tell Freshteam about all the teams and departments at your organization. You can represent them on the system and associate their respective employees with them. Navigate to Settings > General and start creating a department on Freshteam for each one you have in real.
(You can customize this in 7 minutes)
A great career site often goes unnoticed but is crucial to improve your employer branding while attracting the right set of candidates for your organization. Check out how our customers have customized their career sites to achieve this.
You can customize your career site to go with your brand’s design guidelines by adding your organization logo, banner image and more by navigating to Settings > Career site.
Here is a detailed video on how you can customize your career site.
(Takes you a maximum of 10 minutes)
One more way to bond with your team: New software. So to start onboarding and bonding, you’ll have to first add your hiring team members as employees to Freshteam and then assign them with appropriate user roles. You can do that by navigating to the Employee directory > Add employee. If you’d prefer importing them at one shot, simply import in bulk.
While you do, if you need help with understanding who should have which roles in Freshteam, read this.

(Takes 15 minutes to set this up)
Do you have a lot of candidates dropping emails to your careers email(something like careers@mycompany.com)? You can add this email id to Freshteam, and once this is set up, any candidate who drops an email to your careers email id will be created as candidate profiles in Freshteam. For more information on setting this up, click here.
(Takes 5 minutes to set this up)
The main reason you switched to Freshteam is to make your hiring easy and smart, which is accessible from one place, eliminating the need to shuffle between multiple applications. One such place where you keep shuffling and missing is Emails. To make sure you don’t miss a single email and also have one place to hold all candidate conversations sync your email id with Freshteam. If you have been using a Gmail client, click here to know more. If you have been using O365 or outlook email, refer to the help article here.
(Takes 10 minutes to set this up)
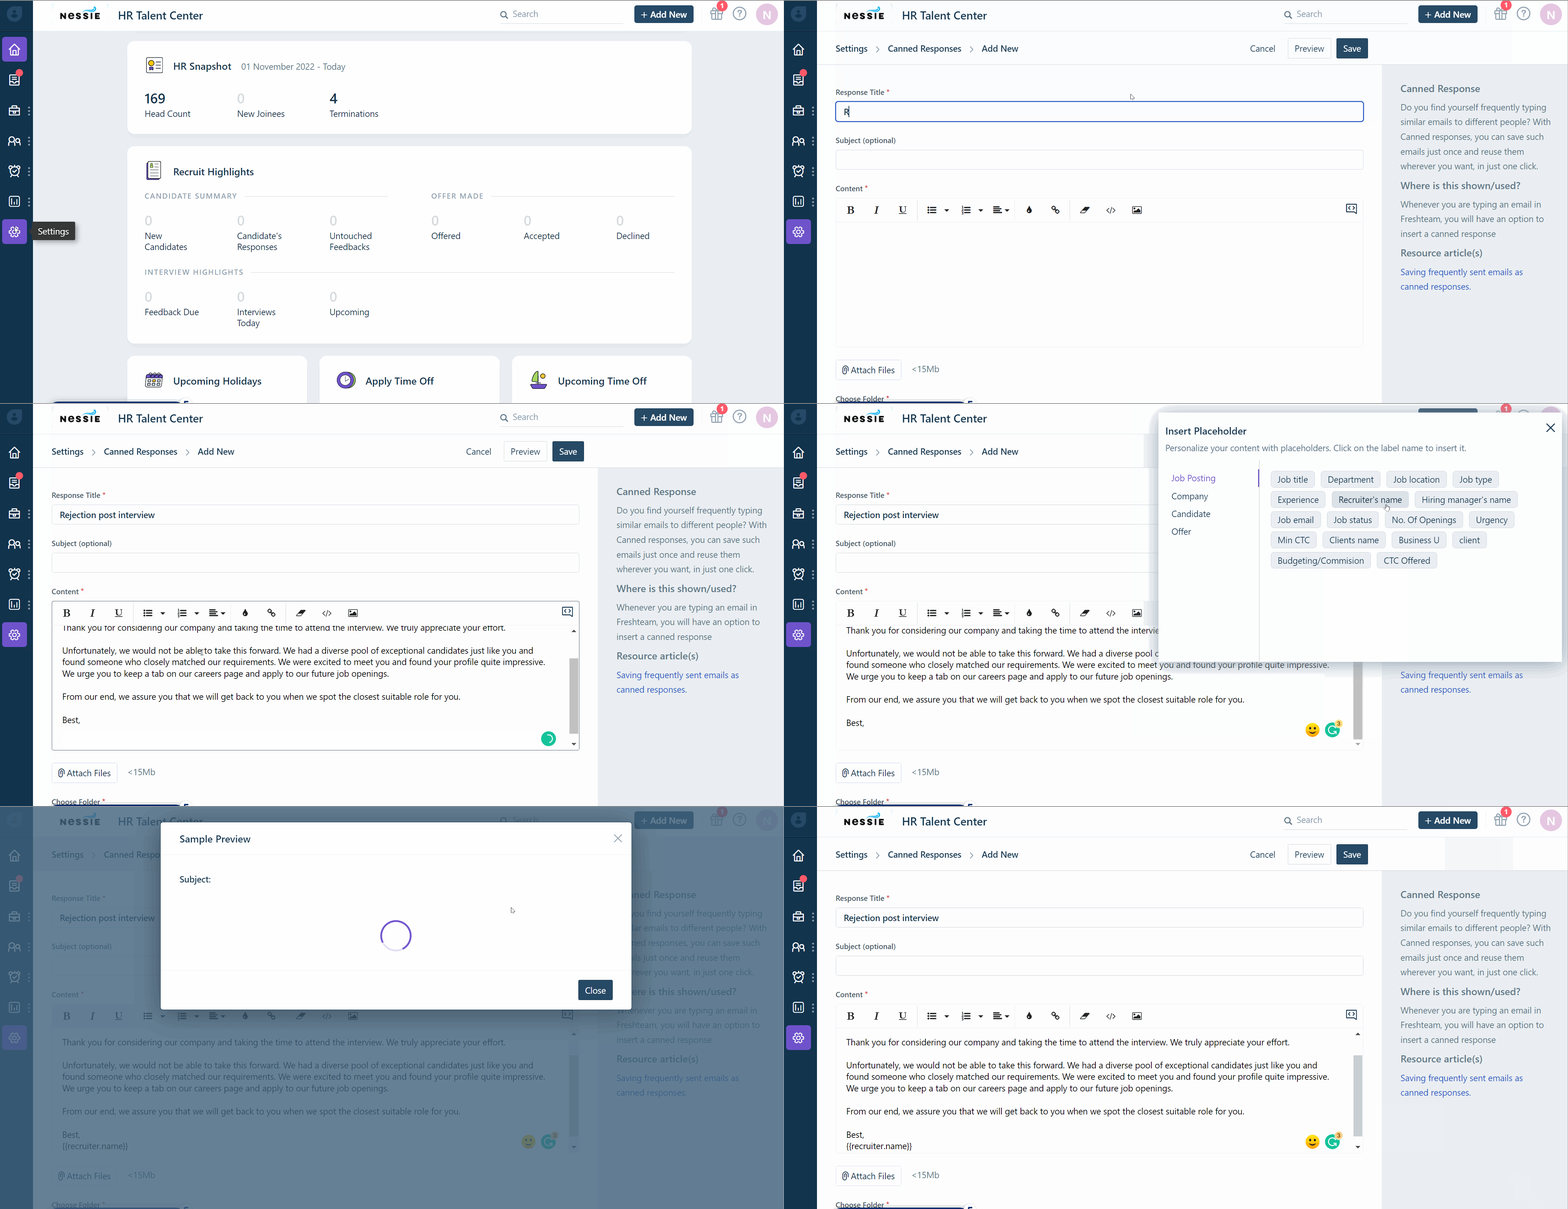
You can add a copy of your frequently sent emails to the candidates by navigating to Settings > Productivity > Canned Responses. Do make use of the placeholders to automatically populate the details like first name, job title in your response based on what’s available in the candidate profile.

(Takes a maximum of 2 minutes for each notification)
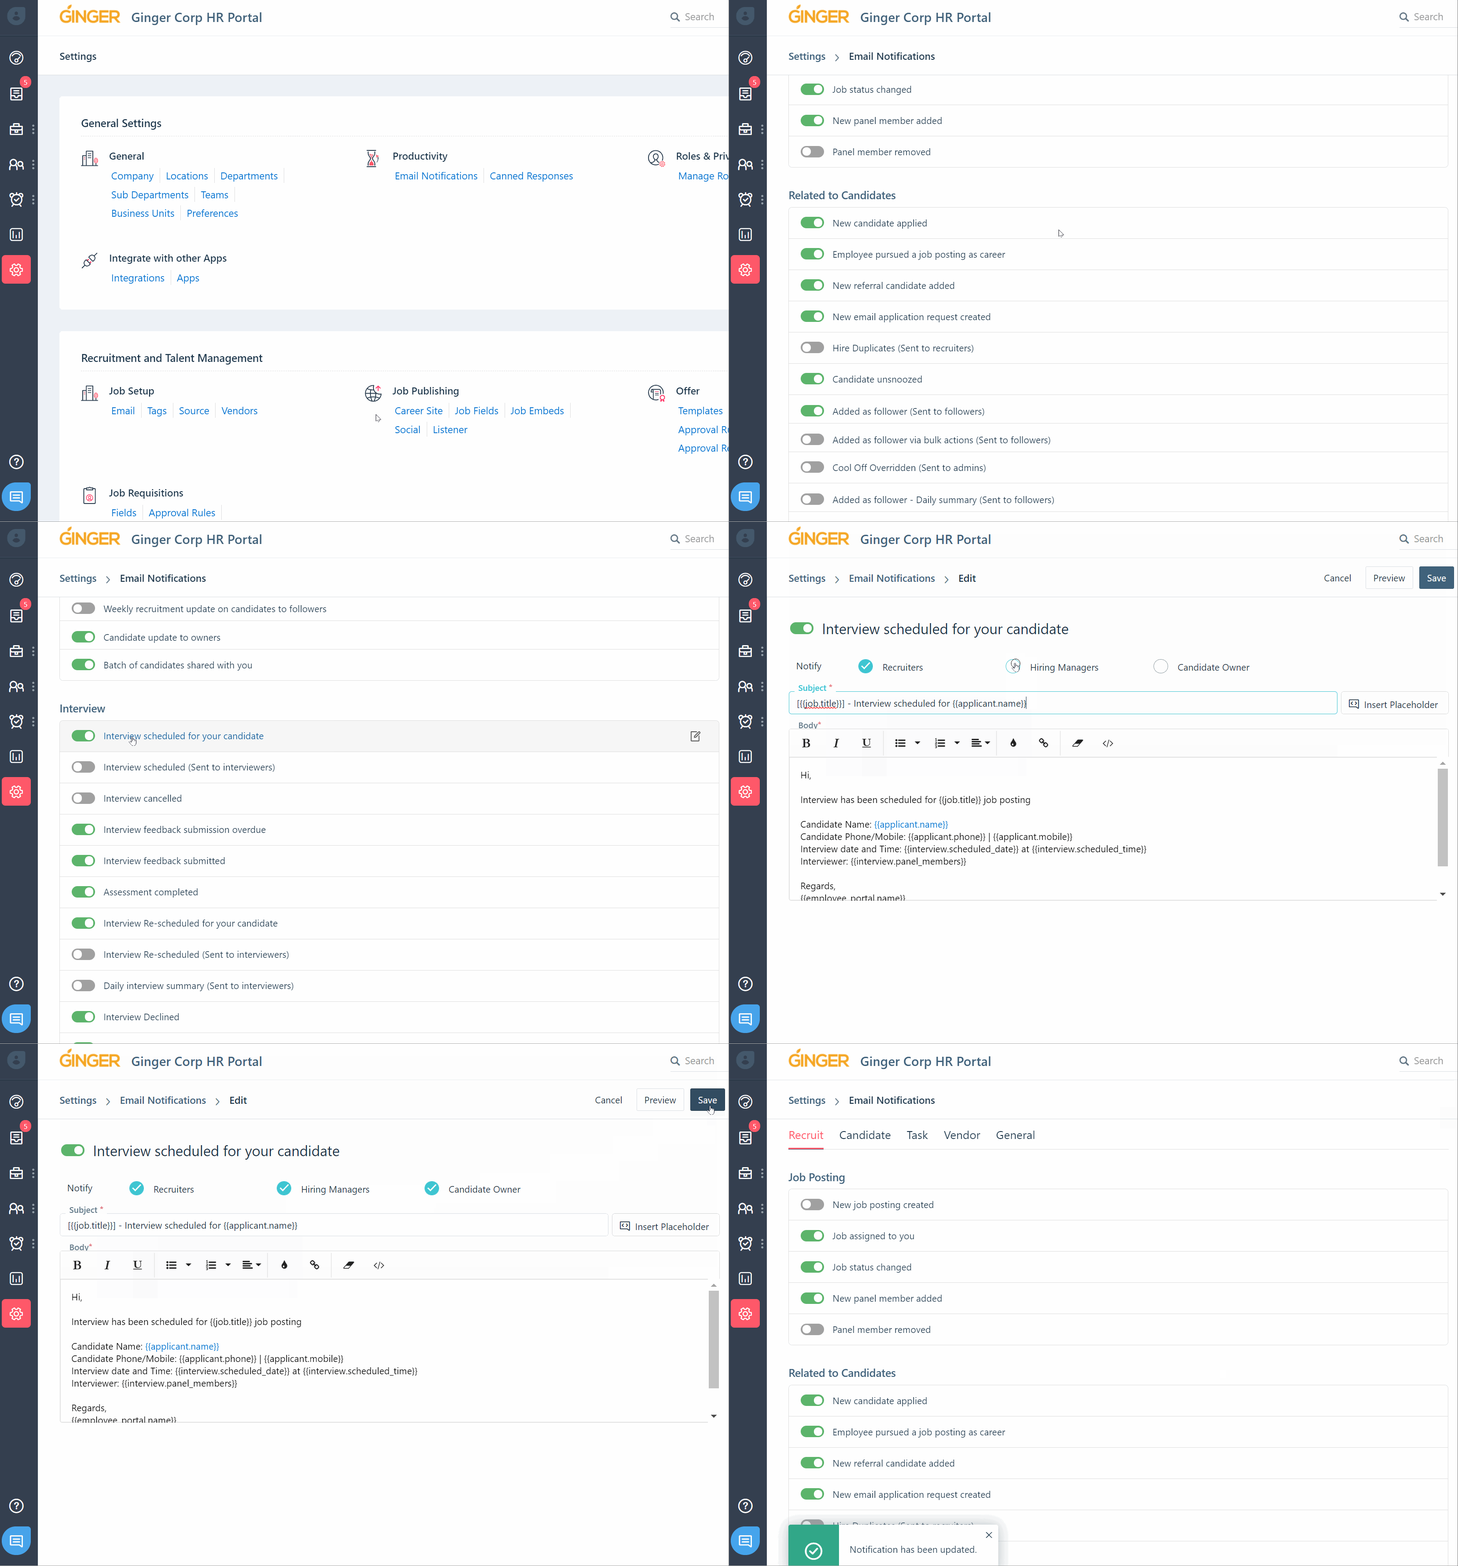
The email notifications in Freshteam can save a lot of time automating your workflows. You can access these notifications by navigating to Settings > Email notifications and choose to enable/disable them. Click here for more information on each notification.

(Takes 2 minutes to create a job)
You are one job post away from some amazing candidates flooding in. So why wait? Navigate to the Recruit section > choose 'add new job posting', enter the details of the job posting, and hit 'Publish'. TADAA! The job will be published and will be visible in your career portal.
(Takes 2 minutes to create a job)
Make a quick list of team members who will be responsible to hire for a job role - Recruiters, Hiring managers, panel members. Once you have it, you can start creating your mini hiring team on Freshteam by navigating to the ‘Job details’ page of each job.

(Takes 20 minutes to set this up for a job)
Configuring the hiring process before adding candidates is supercritical to ensure the candidates are being handled based on the hiring workflow or process configured.
This configuration includes
Configuring the interview scorecard for the job
Setting up the substages of the interview process for the job
Setting up autopilot workflows to automate repetitive actions/tasks
Pro tip -
You can set the hiring process for one job and copy them to other jobs(thus saving a lot of time) provided there are no candidates in the new job.
(Takes 2 minutes)
You will be able to create a unique application form to capture relevant information from candidates for each job by navigating to the ‘details’ page of the job and drag/dropping the fields.

(Takes around 10 minutes to set this up)
A job published in Freshteam will automatically be visible on the career site provided by Freshteam. However, if you are looking to publish the jobs on your organization’s career portal, you can embed the jobs published in Freshteam to your organization’s career portal by copying the code snippet generated and pasting it in your career portal’s front end code. For more information about job embeds, read this.

(Takes a maximum of a minute to add a candidate)
Freshteam has a lot of ways to add candidates to your instance. You can simply choose to add them one by one, or bulk import through CSV. You can publish the job posting in the job boards like LinkedIn or Indeed, and candidates will be added automatically. Similarly, publish on social channels like Facebook or Twitter, or add vendors or third party users to share candidate profiles on freshteam. Create a tracking URL and share it amongst your circle, or even whitelist an email channel that sends candidate profiles.
(Takes around 4 minutes to schedule an interview for a candidate)
Scheduling interviews with Freshteam is hassle-free. You can schedule interviews and notify the interviewers and candidates in just 5 steps. Do check the video below to know more about this.
(It will take you about a minute to create a user and assign a role on Freshteam)
When hiring as a team, you’ll have multiple people accessing Freshteam. Just to keep each of their Freshteam worlds separate, you can assign user roles to them. Every user role comes with a different set of abilities and defines who can do what. You can read the below list before you start assigning roles to your fellow hiring heroes.

(You can create them in seconds)
Freshteam has an exhaustive list of in-built fields you can use to collect employee information. However, once in a blue moon, you may need something new, something specific to your company. And Freshteam wouldn't be Freshteam if we didn’t think about it. So happened ‘Custom Fields’. You can create custom fields by navigating to Settings > Employee record.

(Might take you about a maximum of 10 minutes)
If you have a huge hiring team or have a long list of employees who ought to be on Freshteam, just opt to bulk import. Saves you time for an extra coffee. So, instead of creating users and assigning roles one after another, you can simply import them all in one shot through a CSV, or integrate Freshteam with your employee directory (G Suite or Office 365).
(This setup, on the whole, should take around 20 mins to configure)
Before setting up your policy, you can choose certain preferences like your time-off types, holiday calendar, workweek, half-day leave, etc., based on your organization’s practices. This is crucial as this is something that would be consumed while creating the time off policy. Do have a look at the below video to know more about how this can be set up.
(Takes around 10 mins for you to create a policy)
The timeoff policies for your organization can be created by navigating to Settings > policy (under time off). Do have a look at the below video to know more about how these policies can be created.
(uploading a populated file should take a maximum of a minute)
The leave balances of your employees can be imported as a CSV file from your previous application to have it updated on Freshteam, continue from where you left off, easily.

(This setup, on the whole, should take around 30 mins to configure)
With Freshteam’s onboarding feature, you can send welcome kits to the new hires with documents/emails, and provide all the information the new hire needs to know on day 1 of joining. Also, you can integrate an e-sign platform for the new hires to add digital signatures to the documents shared.
We are partnered with DocuSign and SignEasy!
(Takes around 3 minutes to create a checklist)
You will be able to create multiple checklists for multiple teams, assign tasks to the stakeholders, and send them reminders to finish the tasks, all in one place. For more information on this, read.
